Saturday, November 17, 2012

CIA French Cuisine Boot Camp Day 2: Crepe Shards, Butter and Love


I bagged on the early breakfast this morning, opting for a little more sleep and a protein bar from my bag. No coffee at the bed & breakfast where I'm staying, though, so I made a quick dash through the cafeteria to fill my travel mug with caffeine before class.

Tuesday through Thursday cooking sessions would be focused on different regions of France. Day 5 would cover bistro & brasserie dishes.  Tuesday's focus:  Normandy, Brittany, Champagne and The North, The Loire, and Paris & Ile de France. Our lecture covered the geography, primary foodstuffs, and dishes for which the northern and western parts of France were known.

We were starting to get more comfortable with Chef Remolina and enjoyed his sense of humor.  He grew up in Mexico but his mother was French, cooking nothing but French food at home.  He regaled us with stories like of his uncle in France who started drinking wine at 8am--that wasn't unusual--and explaining the prevalence of pork in this region of France because it could be kept in the basement during the winter months. Given his upbringing of French cooking at home and surrounded by Mexican food outside the home, I figured he had some pretty diverse food tastes.

"There's a lot of food I don't like," he commented during the lecture.

Long pause.

"Well, not really," he chuckled.  "Even junk food is good."  Yep, I really liked this guy.

As we were released to the kitchen, we divided up our team's recipes and prep work: J would take the Sole Beurre Blanc, I would cover the Galette Complête, T would take the Salade Tourangelle, and we'd figure out the Sauté de Haricots Verts along the way. We also had to marinate the beef for the Boeuf Bourguignon that we'd be making on Wednesday.

My dish translated into English as Buckwheat Crepes with Ham, Egg and Cheese.  My father had been making crepes since he was a kid, and I had never attempted it, so I thought this would be fun to try. It also seemed like something I might actually make again, which was a bonus.

The crepe batter seemed quite runny when I mixed it, so I checked with Chef and he just shrugged it off.  Then he demonstrated how to make the crepes.  Of course, it looked incredibly easy--a little clarified butter in a hot pan, scoop some of the batter into the pan with a ladle, let it set, flip it with your fingers, then slide it onto a plate. Piece of cake.

Not so easy for me.

Keeping an eye on my new friend L who was making sweet crepes next to me, I attempted to replicate the procedure. The crepe stuck to the pan, I singed my fingers trying to flip it, and ended up with several pieces of cooked batter.  This could not reasonably be called a crepe. Crepe shards, maybe.

L tried to offer guidance, but I still had trouble getting it right. My teammates were nibbling on the shards and encouraged me to place my 'mistakes' into a bowl where L had been placing hers. My stack of shards quickly overwhelmed hers.

Chef stopped by and looked over my shoulder.

"When are you going to be done with those crepes?" Chef asked, with what I read to be a tone of impatience in his voice.

"When I get them right!" I retorted with a mix of irritation and humor. I'll be damned if I'm going to give up now.  T & J each took a turn offering suggestions.  More butter?  Less batter? The trick was getting the right balance between the amount of batter, the heat under the pan, and the right amount of butter to get the crepe to set well enough that I could slide it to the edge of the pan and flip it with my fingers.  More often than not, the crepe would stick, tear, or otherwise resist my attempts to flip it neatly and therefore ended up on the scrap heap.


Eventually I had enough crepes for the dish and was ready to move on to the next step: frying the eggs and assembling the galettes, both of which appeared to need to be done at the same time. Chef came over to help. I put the crepes on plates and topped them with shredded gruyere and a slice of ham. Chef fried the eggs, one at a time, and slid each one on top of the crepe/cheese/ham stack. Perhaps he didn't trust me to make the eggs given the trying time I'd had with the crepes? I didn't know, but frankly I didn't mind either way.

J had plated his sole, and Chef took from his hand the pan he'd used to prepare the fish. Chef sniffed the now-empty pan and said, "Too much white pepper."

The three of us looked at each other in amazement.  "How can you tell that just from sniffing the pan?"

"White pepper can have a kind of a dirty smell when there's too much of it," he said.  "You can smell it in the pan. See?"

We each sniffed the pan. I didn't smell anything. Perhaps that's why he's the chef and I'm paying for the privilege of being in his kitchen.

It was about this time that I fell in love again. Completely head over heels.

Shallots.

The love child of onions and garlic.

Sure, I'd eaten and prepared shallots many times before.  But somehow this time was different.  Perhaps it was the excessive amount of butter in which they were sautéed, or maybe that Chef had us add extra shallots versus what the recipe required. It didn't matter. I knew shallots would never disappear from my life again. After being sautéed in the butter, the shallots were tossed with haricot verts (green beans) that had been boiled in water, shocked in a bath of ice water, drained and held until we were close to serving time.

Together we plated our dishes, put the beef in the fridge to marinate overnight, and put our platters on the table with everyone else's food. The spread of fabulous dishes was almost overwhelming. Everything looked amazing, and I wanted to try everything. After snagging at least a spoonful of everything, I made my way to the dining room to dig in.

Our team's dishes all turned out quite well. T's salad, which featured bits of pork belly and toasted hazelnuts, was excellent. I thoroughly enjoyed my galette--the nuttiness of the buckwheat crepe went quite well with the ham and cheese, and Chef had cooked the eggs so they were just runny enough to ooze over the entire stack. And J's sole was delicious. Just the right amount of white pepper, in my opinion.


Galette complête (Makes 6 crepes)

1 cup buckwheat flour
1/3 cup all-purpose flour
2 tsp salt
2 eggs, beaten
1 cup milk
1-1/2 cups water
1-1/2 tsp vegetable oil
1-1/2 tbsp butter, melted, plus more as needed for the pan

Filling:
2 tbsp butter, melted
6 eggs
2 cups Gruyère cheese, shredded
12 ham slices

Whisk the flours and salt together in a bowl. Make a well in the center. In a separate bowl whisk together the eggs, milk, water, oil and butter.

Add the liquid to the dry ingredients about 1/2 cup at a time, blending after each addition. Whisk only long enough to form a smooth batter.

Heat a 12" nonstick skillet over medium heat. Brush the pan lightly with melted butter and add 1/3 cup of batter. Immediately after pouring, rotate pan to spread the batter so it coats the pan evenly. Cook until golden brown. Turn and cook on the other side. Transfer to a warm platter. Repeat process as necessary.

When ready to serve, place one crepe on a warm plate and scatter 1/3 cup of cheese on top. Place 2 slices of ham on top of the cheese.  Heat some of the butter for the filling in a nonstick skillet. Add an egg and cook sunny-side up, just until the whites are set. Slide the egg on top of the ham and, if desired, fold the edges of the crepe over the ham and cheese, leaving the egg exposed (we skipped this in class).  Reserve warm while completing the remaining crepes. Serve warm.


Sauté de Haricots Verts (Serves 6)

1-1/2 lb haricot verts (thin green beans), washed and trimmed
2 tbsp butter
2 tbsp shallots, minced (we used more like 1/4 cup) Salt & pepper to taste

Bring salted water to a full boil and add the haricots verts.  Cook until al dente. Transfer to an ice bath to shock (stop the cooking process). Drain well.

When ready to serve, add the butter to a sauté pan set over medium heat. Add the shallots and sweat until translucent. Add the haricots verts and season to taste with salt and pepper, and toss to coat.

Sauté until the beans are heated through.  Serve on a heated platter.

Sunday, November 4, 2012

French Cuisine Boot Camp at the Culinary Institute of America--Day 1


Note: I have had the good fortune to have taken several classes at the Culinary Institute of America (CIA) in Hyde Park, NY as part of their 'Enthusiasts' offering of non-degree classes. This is the first installment describing my experience in my most recent 5-day Boot Camp. My views do not necessarily reflect those of my classmates, but I do hope they--and you--enjoy reading my perspective on the course. 

Day 1: Orientation and Mother Sauces

6am. Orientation begins in the dining room of the Continuing Education Center at the CIA. I'm just pulling into the parking structure. Frick.

Fortunately I know where I'm going, as I've been lucky enough to have attended CIA Boot Camps before.  I head straight into the room and quietly apologize for my tardiness.  I sign in & grab my new duffel bag--my fourth official 'Boot Camp' bag. I scan the room and choose a table near the windows where an older gentleman is seated. The crowd looks pretty much like every other at the first-day orientation: a mix of people in casual attire (first-timers) and chef uniforms (repeat boot campers).  Sometimes there are professional chefs in their own chef's whites, but mostly these classes tend to be made up of foodies.

After our run-through of rules and expectations, we grab breakfast in the student cafeteria. It hardly seems appropriate to call it a cafeteria when all of the food is made to order and the specials include things like egg white omelets with ham, goat cheese and pesto.  They also offer an almost overwhelming selection of daily options such as eggs any way with bacon, sausage, potatoes, etc., two choices of smoothies, baskets full of pastries, and so on.  Everything is made by a class of culinary students who started their efforts at 2am.

This is our first opportunity to get to know our classmates, and it's the typical opening round of questions: what's your name, where are you from, occupation, is this your first time here, etc.  The camps tend to draw a lot of people from the New England states, plus a smattering of others from the rest of the U.S.  I'm amazed to meet a fellow Wisconsinite who lives just about 40 miles from me. I've never run into another Cheesehead in class except for the time I came with one.

We return to the classroom, and there is little time to chat as Chef dives quickly into the lecture on sauces. He will demonstrate the "mother sauces" in the kitchen, after which we will make derivative sauces in our teams. Since we're only making sauces and not actual dishes, one of the full-time student classes will prepare our lunch for day one. For the rest of the week, whatever we make we will eat for lunch.

After talking through the recipes we move into the kitchen to declare our spots for the week.  The kitchen we'll occupy over the next five mornings consists of four team stations built around back-to-back stoves and ovens. Each station has its own mini fridges under the counter, plus two cutting board stations and a table behind it with a third cutting board station. Each cutting board station has an apron and two side towels folded neatly, plus a chef's knife and paring knife.

My new Wisconsin friend invites me to join her team, but the linens are already taken from that spot. I wander until I find an open spot and find myself joining Team 2 with J and T. I take a quick peek at my binder to see what sauces our team will make: chasseur, fresh tomato sauce, soubise, and choron. We also need to marinate some pork for one of tomorrow's dishes, salade tourangelle.

Chef calls us all over to the stove on the other side to begin his demonstration of mother sauces. There are five basic sauces that feed all others in French cooking: velouté, béchamel, espagnole, tomato and hollandaise. He starts by making a roux, a roughly 50/50 combination of flour and butter that is cooked in a sauté pan until it reaches the appropriate color for the sauce you're making. The longer you cook the roux, the more it browns and takes on a stronger, nuttier flavor. For white sauces, the roux is left "pale" to "blonde," whereas a brown sauce will be cooked to the color of peanut butter. All of this has to be done while watching carefully and stirring, because a burned roux needs to be tossed.

After our demonstration we disperse to our stations to figure out who would prepare what sauce.  I take chasseur, a derivative of espagnole sauce with mushrooms and wine.  I keep thinking it's 'chausseur' which I think has something to do with shoes if I remember my college French correctly.  T takes soubise sauce, a bechamel derivative.  J accepts the challenge to make choron sauce, an egg-based variation on Hollandaise. I do not envy his task--working with egg yolk over simmering water scared the bejeebers out of me, and since I have no plans to recreate such a sauce after returning home, I'm not sorry to let someone else take it. 

We all dive into preparing our sauces, starting to figure out how we'll work together. There's a lot of bumping into each other initially, borrowing ingredients from each other, asking one another's opinions on what we're doing, and calling Chef over as needed.

My chasseur sauce turns out to be fairly straightforward. That's a very good thing, as we'll have to stop midway through preparing our recipes to have lunch. Plus, there's a photographer coming in the afternoon to take pictures of each of us with Chef Remolina, for which we'll need to step away from our sauces briefly if we're still cooking at that point.

After lunch the sauces are really rolling there's a crowd around the stove. The burners seem to be completely ablaze or shut off entirely, so we're all a bit on edge trying not to burn our first projects in the CIA kitchen.

J's tenacity impresses me.  After fighting with scrambled eggs on the first two tries, he presses on for a third attempt with his sauce with the help of one of our student assistants.  He continues whisking diligently, and reluctantly hands the whisk to the student and T in order to get his  photo taken with Chef. He returns afterward and produces a perfect sauce.

Everyone pours their sauces into tall metal pots--bain maries--and places them on a large table in the kitchen. Chef has us gather around the table and passes a plastic dishwashing basket full of spoons so we can try each sauce.  We follow each other in a circle around the table, ooh-ing and aah-ing over the delicious and, in many cases, decadent sauces we all created on our first day.  This is clearly the start of a delicious friendship.

Espagnole sauce

Brown roux: 3/4 cup butter + 2 cups all-purpose flour
1/3 cup vegetable oil
Mirepoix: 2 cups onions, medium dice + 1 cup carrots, medium dice + 1 cup celery, medium dice
2/3 cup tomato paste
5 qt brown veal stock
Sachet d'epices: 4 parsley stems, 4 bay leaves, 4 garlic cloves, 1 tsp dried or fresh thyme, and 1 tsp cracked black peppercorns, all tied into a cheesecloth sachet Salt and pepper to taste

Heat the butter in a sauté pan over medium heat until it stops bubbling. Add the flour and cook, stirring frequently, until it becomes a deep, rich, brown color (darker than peanut butter). Reserve.

Heat the oil in a saucepot over low to medium heat and sauté the onions until translucent. Add the carrots and celery and continue to brown. You are looking for a golden brown color from the onions.

Add the tomato paste and cook for several minutes until it turns a rusty brown and has a sweet aroma.  (This evaporates the acid and leaves the tomato flavor.)

Add the stock and bring it to a simmer.

Whisk the roux into the stock. Return to a simmer and add the sachet. Simmer for about 1 hour, skimming the surface as necessary.

Strain the sauce. Adjust seasoning with salt and pepper. The sauce is ready to be served now, or can be rapidly cooled and refrigerated for later use.

Friday, August 24, 2012

Decadence ... In a burger

I have had three remarkable experiences involving burgers in the past month. Each of them evoked a When Harry Met Sally type of reaction in me.  Fortunately, in each instance, I was surrounded by people who understood and had their own--how shall I put this?--enthusiastic responses to their food.

But I really didn't want to write about burgers. Honestly, it seems like every food magazine and foodie email I've seen this summer features burgers.  Don't we all know how to make burgers? 

So after my first orgasmic burger experience, at the fabulous Hubert Keller's Burger Bar in Las Vegas,  I waited. The burger: the Hubert Keller Burger, with buffalo meat, caramelized onions, baby spinach, bleu cheese, and a red wine & shallot sauce. OMG.

Then, this past Saturday, I went to a favorite Milwaukee-area restaurant, Cafe Hollander in Wauwatosa. I've had many wonderful things from their menu in the past--the Farmer's Market Omelet, the pulled pork sandwich, several great salads--but this time, my first time having dinner at the restaurant, it was the Bleu-cy Burger that caught my eye. It's a half-pound burger stuffed with cambazola cheese (a cross between camembert and Gorgonzola) and topped with bleu cheese, bacon, and their homemade Tandem Dubbel barbecue sauce.  We couldn't decide which was more decadent--my burger or my son's goat cheese Mac & cheese.  Wow.

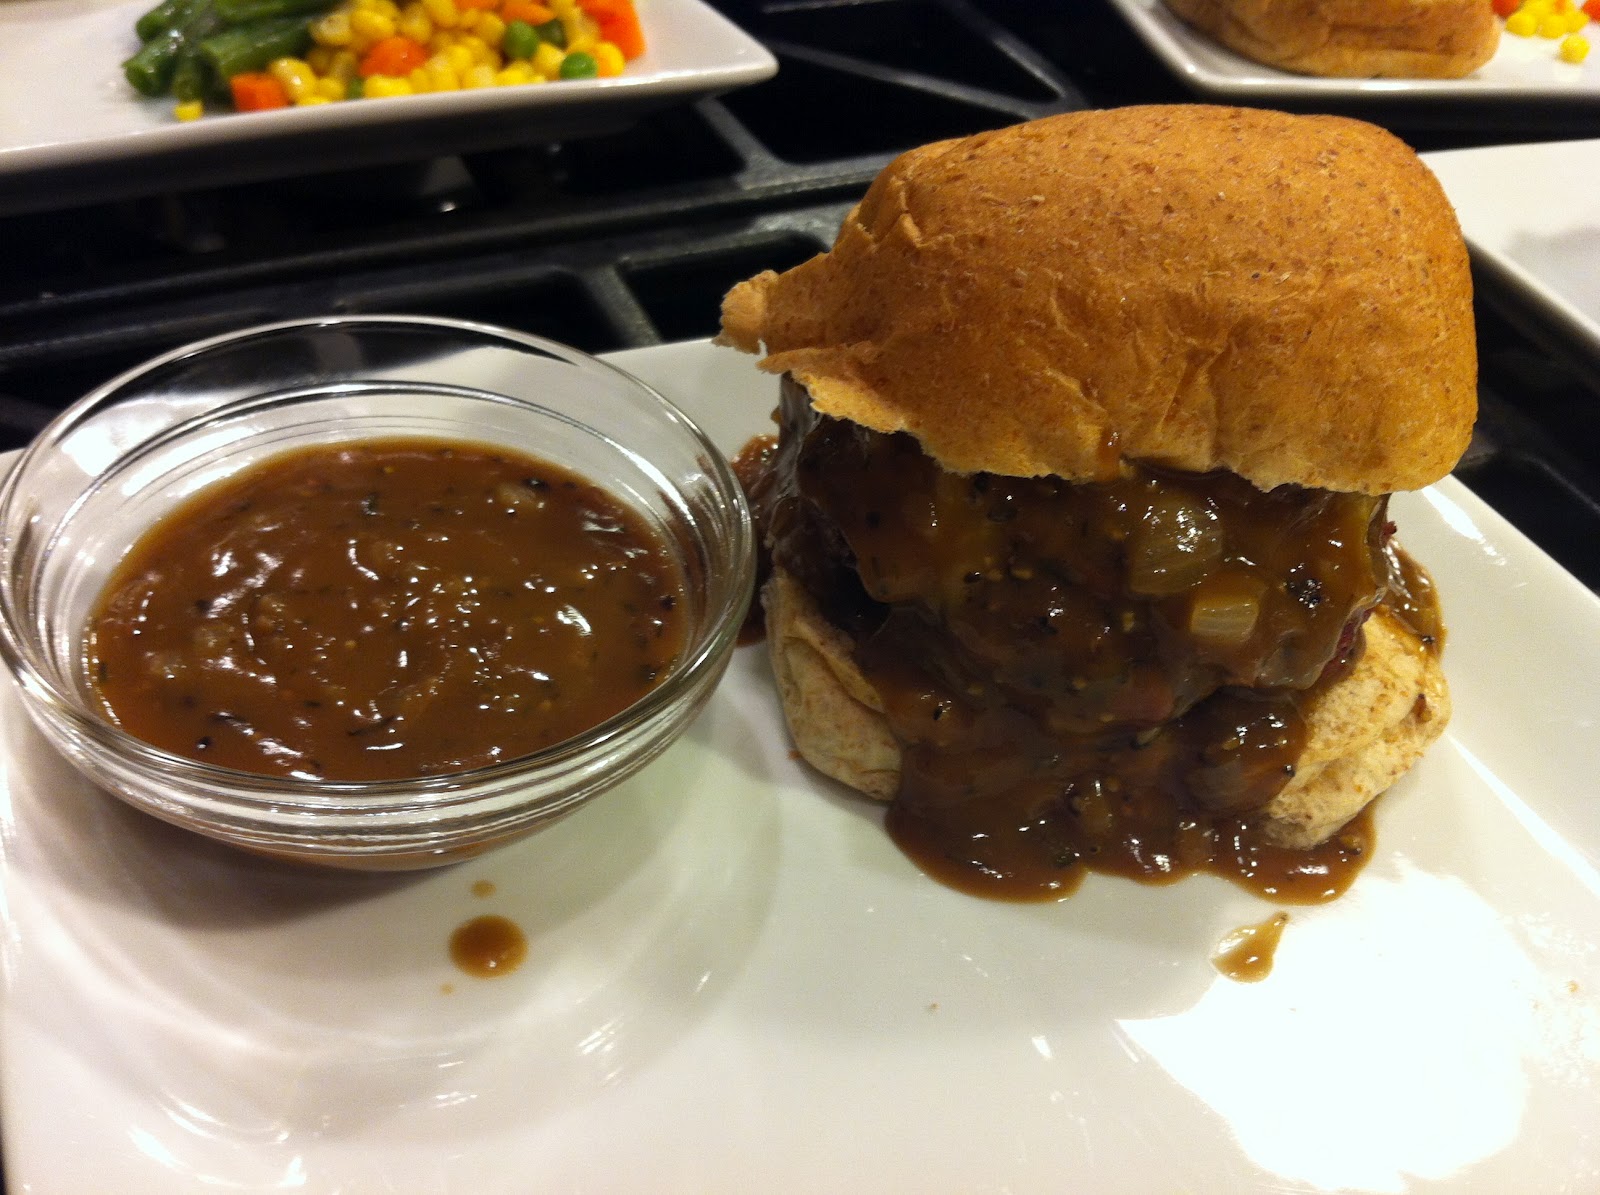
But it was dinner Sunday night that put me over the edge and prompted me to write. Despite having our burgers at Cafe Hollander just the night before, my husband & I still had burgers on the brain and consented to our sons' request for burgers at home. Being a big fan of steak au poivre and all its peppery goodness, I decided to make burgers au poivre. 

I had made an improvised version of an au poivre sauce before--not totally authentic, but quite satisfying nevertheless. The hardest part is just finding the demiglace in the store in the first place. Making it involves hours of work including roasting veal bones, simmering them forever to make stock, and then reducing that sauce to demiglace.  I find it in small, shelf-stable containers sporadically at random specialty food stores and stock up as much as the expiration dates allow. Today I had one left, and it would be used for a very worthy cause. And this time I was going to add shallots, my current favorite ingredient.

Since the boys don't generally care for an abundance of pepper, I decided to stick with cheeseburgers for them but let them choose which cheese they wanted. My 12-year-old opted for cojack, while my 7-year-old budding gourmand chose a goat Gouda. He's a huge fan of goat cheese--go figure! I put bleu cheese on mine, and my husband went for white cheddar.

The au poivre sauce came together beautifully. It was one of those moments where I could tell before tasting it that it was going to be good. My husband, who was already starving, threatened to stand at the stove and just eat the sauce with a spoon if the burgers weren't done soon.

We slathered the grownups' burgers with the sauce and put some into small bowls for dipping our fries. These burgers ranked right up there with the Burger Bar and Cafe Hollander, and were all the better because we can make them whenever we want.

Burgers Au Poivre

The burgers:
1 lb lean ground beef (preferably grass-fed organic)
1/4 onion, minced
1 tsp malt vinegar
Salt (to taste)
2 tbsp cracked black peppercorns

Combine all ingredients except peppercorns in a bowl and mix well with your hands.  Form into patties. Coat both sides with cracked peppercorns. Grill to preferred level of doneness.

Au Poivre sauce:
1 pkg demiglace (1.5 oz)
1 cup beef stock (or broth, in a pinch)
2 tbsp butter (unsalted)
2 tbsp flour
2 shallots, minced
1-2 tbsp cracked black peppercorns
1 tsp dried thyme
1/4 cup red wine
Salt (to taste)

Place beef stock in a saucepan and heat to a slow simmer.  Add demiglace and stir until dissolved.  Set aside and keep warm.

Melt butter in another saucepan.  Add shallots and sauté on medium heat until translucent (do not brown).  Sprinkle flour over the shallot mixture and stir until well combined.  Cook the mixture--your roux--until it turns blond, stirring regularly to prevent burning.  Add thyme and stir until combined.

Pour the stock/demiglace mixture over the roux and whisk vigorously to integrate without creating lumps.  Allow the sauce to simmer slowly, stirring occasionally, for about 5-10 minutes.  Taste and add salt if needed, taking care not to over salt because the sauce will become more concentrated in flavor as it cooks.

Stir peppercorns and wine into the mixture and simmer another 5 minutes until fully integrated.  Taste and adjust seasonings as needed.  Pour over pepper-encrusted burgers or steaks.


Thursday, August 9, 2012

Mise en place

“Mise en place” is a cooking term defined at the beginning of every Culinary Institute boot camp I’ve attended and occasionally thrown out during cooking shows on TV. Literally, it translates from French to English as “setting up.” I’ve heard others describe it as “everything in its place,” which is how I usually think of it. According to Chef Remolina, as well as several other chefs at the CIA, it refers to having all of your ingredients at the ready, including chopped and measured as appropriate. Chef also stressed that this includes being mentally prepared—having reviewed the recipes and understanding what needs to happen when before you actually dive into preparation. In practice, the recipe doesn’t necessarily turn out as planned every time, but if you’re prepared you’re better able to adapt and make things work in the end.


After I attended my first boot camp at the CIA with a good friend, she gave me a lovely silver bracelet with “mise en place” engraved on it. It’s much more than a reminder for my love of food and the wonderful experience I had at that first boot camp. Instead, it has become a bit of a life mantra for me. People who know me well will tell you that I’m not the most organized person on the planet. I can even hear them chuckling as they read that last sentence, knowing it’s the understatement of the year. But it’s certainly aspirational for me, a reminder to think things through, prepare myself physically and mentally for what’s ahead of me.


A professional kitchen is a place of organized chaos, with a tilt toward the “chaos” part of that phrase when it’s boot campers in the kitchen. So is my life. Yours too? Yeah, I hoped I wasn’t the only one. It helps to have the occasional reminder to put things in their place, think things through, and be prepared as you can for whatever happens. I’m not there yet, but I keep looking at my wrist to remind myself to step back, think it through, and keep trying.

Wednesday, July 25, 2012

Farm Share Ratatouille

This year is our first participating in a community-supported agriculture program. The deal is, we pay a local organic farmer a fee in the winter, and they use the funds to buy seeds and run the farm. Once plants start cranking out the produce in the spring and summer, we pick up a box full of our share of the items picked for that week.  We don't know what will be in the box until we get an email the day before our pickup.

So far there have been a few items in our boxes that have mystified me as to how to use them. Fortunately I have some foodie friends I reach out to for advice, and then there's also Google. Kale and kohlrabi were both foreign entities to me prior to this program--I may have been able to identify them on sight, but that's about it.

The kale ended up torn into potato-chip-sized pieces, tossed with olive oil, salt & pepper, and spread on a sheet pan to bake in the oven until crispy. These kale chips were initially recommended to me by my food friend Iris, who is, incidentally, a bit of a free spirit who lives in the Bahamas and cooks on private charter boats in the Caribbean. Iris also helped me with several suggestions for kohlrabi, including braising the greens and using the root cooked and mashed with potatoes, turnips, or whatever.  Iris rocks.  But I digress.

The biggest challenge with the box of produce each week is preparing, storing and using it before it goes bad. Such was the situation last night when, the night before I had to leave for a 4-day business trip, I found myself with a fridge overflowing with produce, with much of it likely to go bad before I returned. Oy. My biggest concerns were the Roma tomatoes that we're still waiting to be roasted, the Asian eggplant we'd gotten the week before, and a bag full of small Brussels sprouts. In addition, we'd just received zucchini and basil in our box for the week.

The solution: a vegetarian hodge podge of ratatouille with a side of caramelized Brussels sprouts.

If you've seen the Pixar movie, you may know that ratatouille is a French peasant dish.  I can't see or hear the name without thinking 'rat patootie.' I had made it once before, attempting to follow the style of the dish as it was in the movie--the rat turned this rustic mixture of diced and stewed vegetables into an elegant dish of thinly sliced and stacked vegetables that wowed the skeptical critic who had come to experience the restaurant. That movie version, by the way, was designed by the famous chef Thomas Keller of the French Laundry in the Napa Valley. My attempt was mediocre and did not win over my family.

This time I was using the recipe from my French Cuisine Boot Camp at the Culinary Institute of America.  While I hadn't made the dish myself, I had seen some of the preparation and tasted the final product and thought it was wonderful.

The danger: the recipe is chock full of zucchini and eggplant, which I needed to use up but which are not high on the list of food favorites in my family. In fact, it was highly likely that I would be the only one eating it.

The ratatouille was remarkably simple to prepare: dice the ingredients, sauté them in order, then let them simmer. It smelled delicious. While the ratatouille simmered, I trimmed the Brussels sprouts, cut the larger ones in half, then steamed them until they were mostly cooked. Meanwhile, I melted some bacon fat in a pan (when I don't have any leftover bacon fat on hand, I just cook 2-3 strips of bacon) and tossed in a diced onion to sauté. Once the onions are translucent, toss in the Brussels sprouts and allow them to stay put and brown well on one side. Then toss them so the other side can cook. Once they're well browned, put salt and pepper on them and you're good to go.

The verdict? Everyone devoured the Brussels sprouts in short order. Yes, I am blessed to have two kids who actually like Brussels sprouts, and this is their favorite preparation. The ratatouille was a hit with me and my husband, my older son picked out the zucchini and enjoyed the rest, and my youngest ... Well, let's just say he liked the movie better.

Ratatouille
1 tsp olive oil
2/3 cup red onion, diced
1-1/2 tbs garlic, minced
1 tbs shallots, minced
1 tbs tomato paste
5 plum tomatoes, seeded, sliced 1/4" thick
1 cup diced zucchini
1 cup diced red bell pepper
1-1/2 cups eggplant, diced
1 cup yellow squash, diced
1 cup vegetable stock
Basil, chiffonade, to taste
Dried oregano, to taste
Salt and pepper, to taste

Heat oil in a medium saucepot over medium-high heat. Add onions, garlic, and shallots and sauté until the onions are translucent, about 5-7 minutes.

Add the tomato paste and sauté until it becomes brown, about 3-4 minutes.

Add the tomatoes, zucchini, bell pepper, eggplant, yellow squash and stock. Bring to a gentle simmer and stew, stirring occasionally, until the vegetables are tender, about 15 minutes.

Season with the basil, oregano, salt & pepper.

Monday, May 16, 2011

Embracing color on your plate: purple rice!

You probably know that serving a range of color in our foods is more appealing to the eye and therefore makes the food more appetizing. More recently, scientists are telling us that the natural, bright colors of foods contain anthocyanins that our bodies need, and serving a combination of colors can be quite good for us.

But have you ever tried colored rice?

Personally, I’m a big believer in the idea that kids are more likely to try and like new foods if you keep them interesting and fun, and that includes using color. No, green eggs and ham don’t count: too monochromatic, and totally artificial. Sorry, Dr. Seuss.

So in the warm summer months, I raid the farmer’s market for purple potatoes, red carrots, multi-colored bell peppers—anything to capture the colors of summer and put them on the plate. But since these options are most readily available only in a short period of time, colored rices offer a nice year-round source of healthy color on the plate.

One of our favorite restaurants in town, Koreana, serves a dish called bi bim bahb which consists of several different stir-fried vegetables over rice, with purple rice as one option. Kim, one of the sisters who owns and runs Koreana, explained to me that the purple rice is actually black rice cooked with brown and/or white rice. The color from the black rice bleeds into the cooking water and turns everything purple. In digging further, I learned that the black rice is a whole-grain rice and contains similar health benefits to brown rice.

This led me to search for and experiment with different colored rices. I had to look beyond our local grocery store to find these unusual varieties, but at Whole Foods and at Sendik’s in Whitefish Bay (WI) I was able to find black rice under the name “Forbidden Rice” as well as packages of mixed black and white rices that were marketed as “purple rice” and a different variety altogether marketed as “red rice.”

These rices require slightly different techniques for cooking from one to the next. In general I prefer cooking my rice using the pasta method (boiling it in a large quantity of water and then draining it) as opposed to the pilaf method (cooking the rice in a precise amount of water and stopping when all of the water is absorbed). I have been told repeatedly that the pilaf method is the “proper” method, but I have had much more consistent results using the pasta method and am not about to change anytime soon.

In using the premixed packages of black/white and red/white rices, I heat a 2qt. pot of water to a boil, reduce the heat, then stir in about 1 tsp. of salt. Next, add the amount of rice you want to make, increase the heat until the water returns to a simmer, and cook until the rice is al dente or slightly firm when you bite into it. This usually takes 10-15 minutes, so start testing it at 10 minutes so it doesn’t become a pot of purple mush. Drain the water and let the rice rest on the stove, lid on, until you are ready to serve.

With the “straight” black rice (the Forbidden Rice), I start with the same 2 qt. pot of boiling water and add the 1 tsp. of salt. Then I add black rice to comprise about 2/3 of the total amount of rice I want to cook. Let the black rice simmer for about five minutes, then add basmati or jasmine rice to make up the remaining 1/3 of the total rice. Allow the combined rices to simmer, and start checking it for doneness after seven minutes.

Here are links to both of the rice brands I have tried for black/purple and red rice. I have not purchased from these websites and therefore do not endorse them, but you can see what the package looks like and generally what pricing would be for these items.
Forbidden Rice from Lotus Foods:
Alter Eco Purple Rice and Ruby Red Rice: You probably know that serving a range of color in our foods is more appealing to the eye and therefore makes the food more appetizing. More recently, scientists are telling us that the natural, bright colors of foods contain anthocyanins that our bodies need, and serving a combination of colors can be quite good for us.

But have you ever tried colored rice?

Personally, I’m a big believer in the idea that kids are more likely to try and like new foods if you keep them interesting and fun, and that includes using color. No, green eggs and ham don’t count: too monochromatic, and totally artificial. Sorry, Dr. Seuss.

So in the warm summer months, I raid the farmer’s market for purple potatoes, red carrots, multi-colored bell peppers—anything to capture the colors of summer and put them on the plate. But since these options are most readily available only in a short period of time, colored rices offer a nice year-round source of healthy color on the plate.

One of our favorite restaurants in town, Koreana (www.thekoreana.com), serves a dish called bi bim bahb which consists of several different stir-fried vegetables over rice, with purple rice as one option. Kim, one of the sisters who owns and runs Koreana, explained to me that the purple rice is actually black rice cooked with brown and/or white rice. The color from the black rice bleeds into the cooking water and turns everything purple. In digging further, I learned that the black rice is a whole-grain rice and contains similar health benefits to brown rice.

This led me to search for and experiment with different colored rices. I had to look beyond our local grocery store to find these unusual varieties, but at Whole Foods and at Sendik’s in Whitefish Bay (WI) I was able to find black rice under the name “Forbidden Rice” as well as packages of mixed black and white rices that were marketed as “purple rice” and a different variety altogether marketed as “red rice.”

These rices require slightly different techniques for cooking from one to the next. In general I prefer cooking my rice using the pasta method (boiling it in a large quantity of water and then draining it) as opposed to the pilaf method (cooking the rice in a precise amount of water and stopping when all of the water is absorbed). I have been told repeatedly that the pilaf method is the “proper” method, but I have had much more consistent results using the pasta method and am not about to change anytime soon.

In using the premixed packages of black/white and red/white rices, I heat a 2qt. pot of water to a boil, reduce the heat, then stir in about 1 tsp. of salt. Next, add the amount of rice you want to make, increase the heat until the water returns to a simmer, and cook until the rice is al dente or slightly firm when you bite into it. This usually takes 10-15 minutes, so start testing it at 10 minutes so it doesn’t become a pot of purple mush. Drain the water and let the rice rest on the stove, lid on, until you are ready to serve.

With the “straight” black rice (the Forbidden Rice), I start with the same 2 qt. pot of boiling water and add the 1 tsp. of salt. Then I add black rice to comprise about 2/3 of the total amount of rice I want to cook. Let the black rice simmer for about five minutes, then add basmati or jasmine rice to make up the remaining 1/3 of the total rice. Allow the combined rices to simmer, and start checking it for doneness after seven minutes.

Here are links to both of the rice brands I have tried for black/purple and red rice. I have not purchased from these websites and therefore do not endorse them, but you can see what the package looks like and generally what pricing would be for these items.

Forbidden Rice from Lotus Foods: http://www.lotusfoods.com/Forbidden-Rice/p/LOT-00210&c=LotusFoods@All

Alter Eco Purple Rice and Ruby Red Rice: http://www.worldpantry.com/cgi-bin/ncommerce3/CategoryDisplay?cgmenbr=688899&cgrfnbr=773890

Monday, March 7, 2011

The Sharpest Knife in the Drawer

Last summer I received a phone call from a young man who said my neighbor gave him my number. A red warning light started flashing in my brain—the last time I received a call like this I ended up enduring a 2-hour vacuum cleaner demonstration. It was not a pleasant experience.

This time the caller said he was heading off to college soon and needed to complete a few more demonstrations of Cutco knives so he could gain credit toward earning a scholarship. Between the “Can you help me out?” plea and the fact that he was demonstrating knives, I couldn’t turn him down.

Unlike the vacuum cleaner sales call, I was really excited at the prospect of this visit. I had a handful of Cutco steak knives that I had received as a gift many years ago, and although they were used quite infrequently, I always liked them. And chopping things is, in my mind, one of the most relaxing and therapeutic parts of cooking. Seriously.

I welcomed the young man into my home a few days later. I listened patiently as he went through his education process on how knives are made, what to look for, what are some of the drawbacks of cheap knives—things I had learned through previous cooking classes, a knife skills class, and trial & error, but that perhaps many people didn’t know. But despite the sales pitch and the interesting demonstrations, these knives with their ridged blades and angular, ergonomically correct handles didn’t take my breath away like my sleek, scary-sharp Wusthof knives.

This was not purely a style-over-substance debate. My Wusthof knives fared quite well in the comparative Cutco tests the salesman performed in my kitchen. The salesman seemed surprised that my knives were sharp and well honed, something I think many people neglect to do just because they don’t know how to do it.

The most significant issues I had against these knives were that 1) I can’t get my head around using a serrated knife for most of my cutting, and 2) there were just so many different knives for specialized purposes that seemed unnecessary. Which leads to this question:

What knives does one really need?

There is an important distinction between “need” and “want.” I recognize that. I have many knives in my drawer, and I love them all (or at least most of them). But when push comes to shove, just three knives can get you through most all of your kitchen adventures: a chef’s knife, a paring knife, and a serrated knife. Some people will tell you that you should also have a flexible boning knife, but I have found that I can do pretty much any task with these three.

The chef’s knife serves most chopping purposes. It has the broadest range of uses and is my go-to knife for nearly everything. The traditional chef’s knife has a smooth, curved blade that is well suited to the rocking motion used when you slice and dice. The trendy new variation on this, the Santoku knife, has a flat blade with dimples on the side designed to reduce friction as you slice through food. Either the traditional chef’s knife or the Santoku function quite well as your all-purpose knife. Whether you choose a 6- or 8-inch blade is purely a matter of preference based on what feels right in your hand.

The paring knife, the short stubby knife in your drawer, handles the finer knife work thanks to its shorter blade and easy fit in your palm. It can be used in place of a vegetable peeler when needed and is also good at trimming mushrooms or cutting other small items.

The serrated blade is best for tearing through tougher surfaces—bread crust, cooked meats, or a tomato skin. I have a bread knife that I often use for slicing pork tenderloin or other meats just because it does the job so well. I’m sure that’s not what they teach at the Culinary Institute, but maybe I’d get points for resourcefulness.

Beyond these three knives, you can expand your collection in many different directions. I have multiples of some types of knives that I use a lot so that I can have one of my marathon weekend cooking sessions and always have a clean knife available to me. So I have both a chef’s knife and a Santoku knife, as well as two paring knives. You can also get more specialized knives, which is where the expansive selections of Cutco knives (or, for that matter, any large knife set) come into play. Some of these special players include a boning knife if you debone a lot of chickens or filet a lot of fish; a grapefruit knife if that’s your thing; a carving knife; or kitchen shears (another favorite of mine).

So even if you have decided what knives you need, do you need to pitch the knives in your drawer & start over?

Not necessarily.

I firmly believe that an investment in a few quality tools in the kitchen makes cooking a more enjoyable experience and results in fewer mistakes in the end. My own set of knives is much like the entirety of my house: a combination of things that were given to me, handed down, and items we bought ourselves. My beautiful family of knives represents a blend of Wusthof (my favorites), Chicago Cutlery (from my wedding registry) and a lone CIA knife (that’s Culinary Institute of America, not the other CIA) that I received as part of a cooking boot camp class.

So, take a look at what you have today, what you need, and replace or fill any gaps as needed. Here are my suggestions:
1. If you’re buying a new knife, invest in quality. Look for knives where the metal extends from the tip of the knife all the way through the handle. Avoid wooden handles which can warp and collect germs. You don’t have to spend a fortune on a knife, but if you’re eyeing a new chef’s knife and it only costs $20, you might want to set your sights a little higher.
2. Hone your knives regularly with a sharpening steel. That’s the tool that looks like a metal dowel with a handle. It serves to align the teeth of the blade so that it remains sharp. A sharp knife is actually a lot safer than a dull knife because it’s less likely to slip off of whatever you’re cutting and into your finger.
3. Sharpen your knives every few years. Honing keeps the knife in good shape, but every few years you need to take a more dramatic step and actually get them sharpened, which actually removes some of the metal in order to create a new edge. This can be done by a professional (our grocery store actually offers this service every year around Thanksgiving), or you can try a sharpening device.
4. Wash your knives by hand to avoid damaging the blade. If the knife blade bangs against other silverware in the dishwasher it can put dings in the blade, or the tip can snap off. In all honesty, I put mine in the dishwasher but I make sure the knife is the only thing in that particular slot in order to reduce the risk of damage.

Happy slicing!